Instrument Set-up
Unpacking the instrument
When the instrument is received, follow the guidelines provided to remove the instrument from the packaging.
Keep the instrument’s packaging in a safe place to ensure protected shipping should the unit need to be returned for warranty or demo use.
Welcome Flow
The welcome flow on the instrument will walk the user on how to enable the instrument to be connected to the Internet and register it with the Cloud Software, or to leave it on a standalone mode.
After removing the instrument from the packaging, connect it to the power supply and the ethernet cable.
In order to have the instrument in a fully cloud connected mode, the user or their IT department should follow the requirements described in our “Cloud Connectivity and Setup guide” .
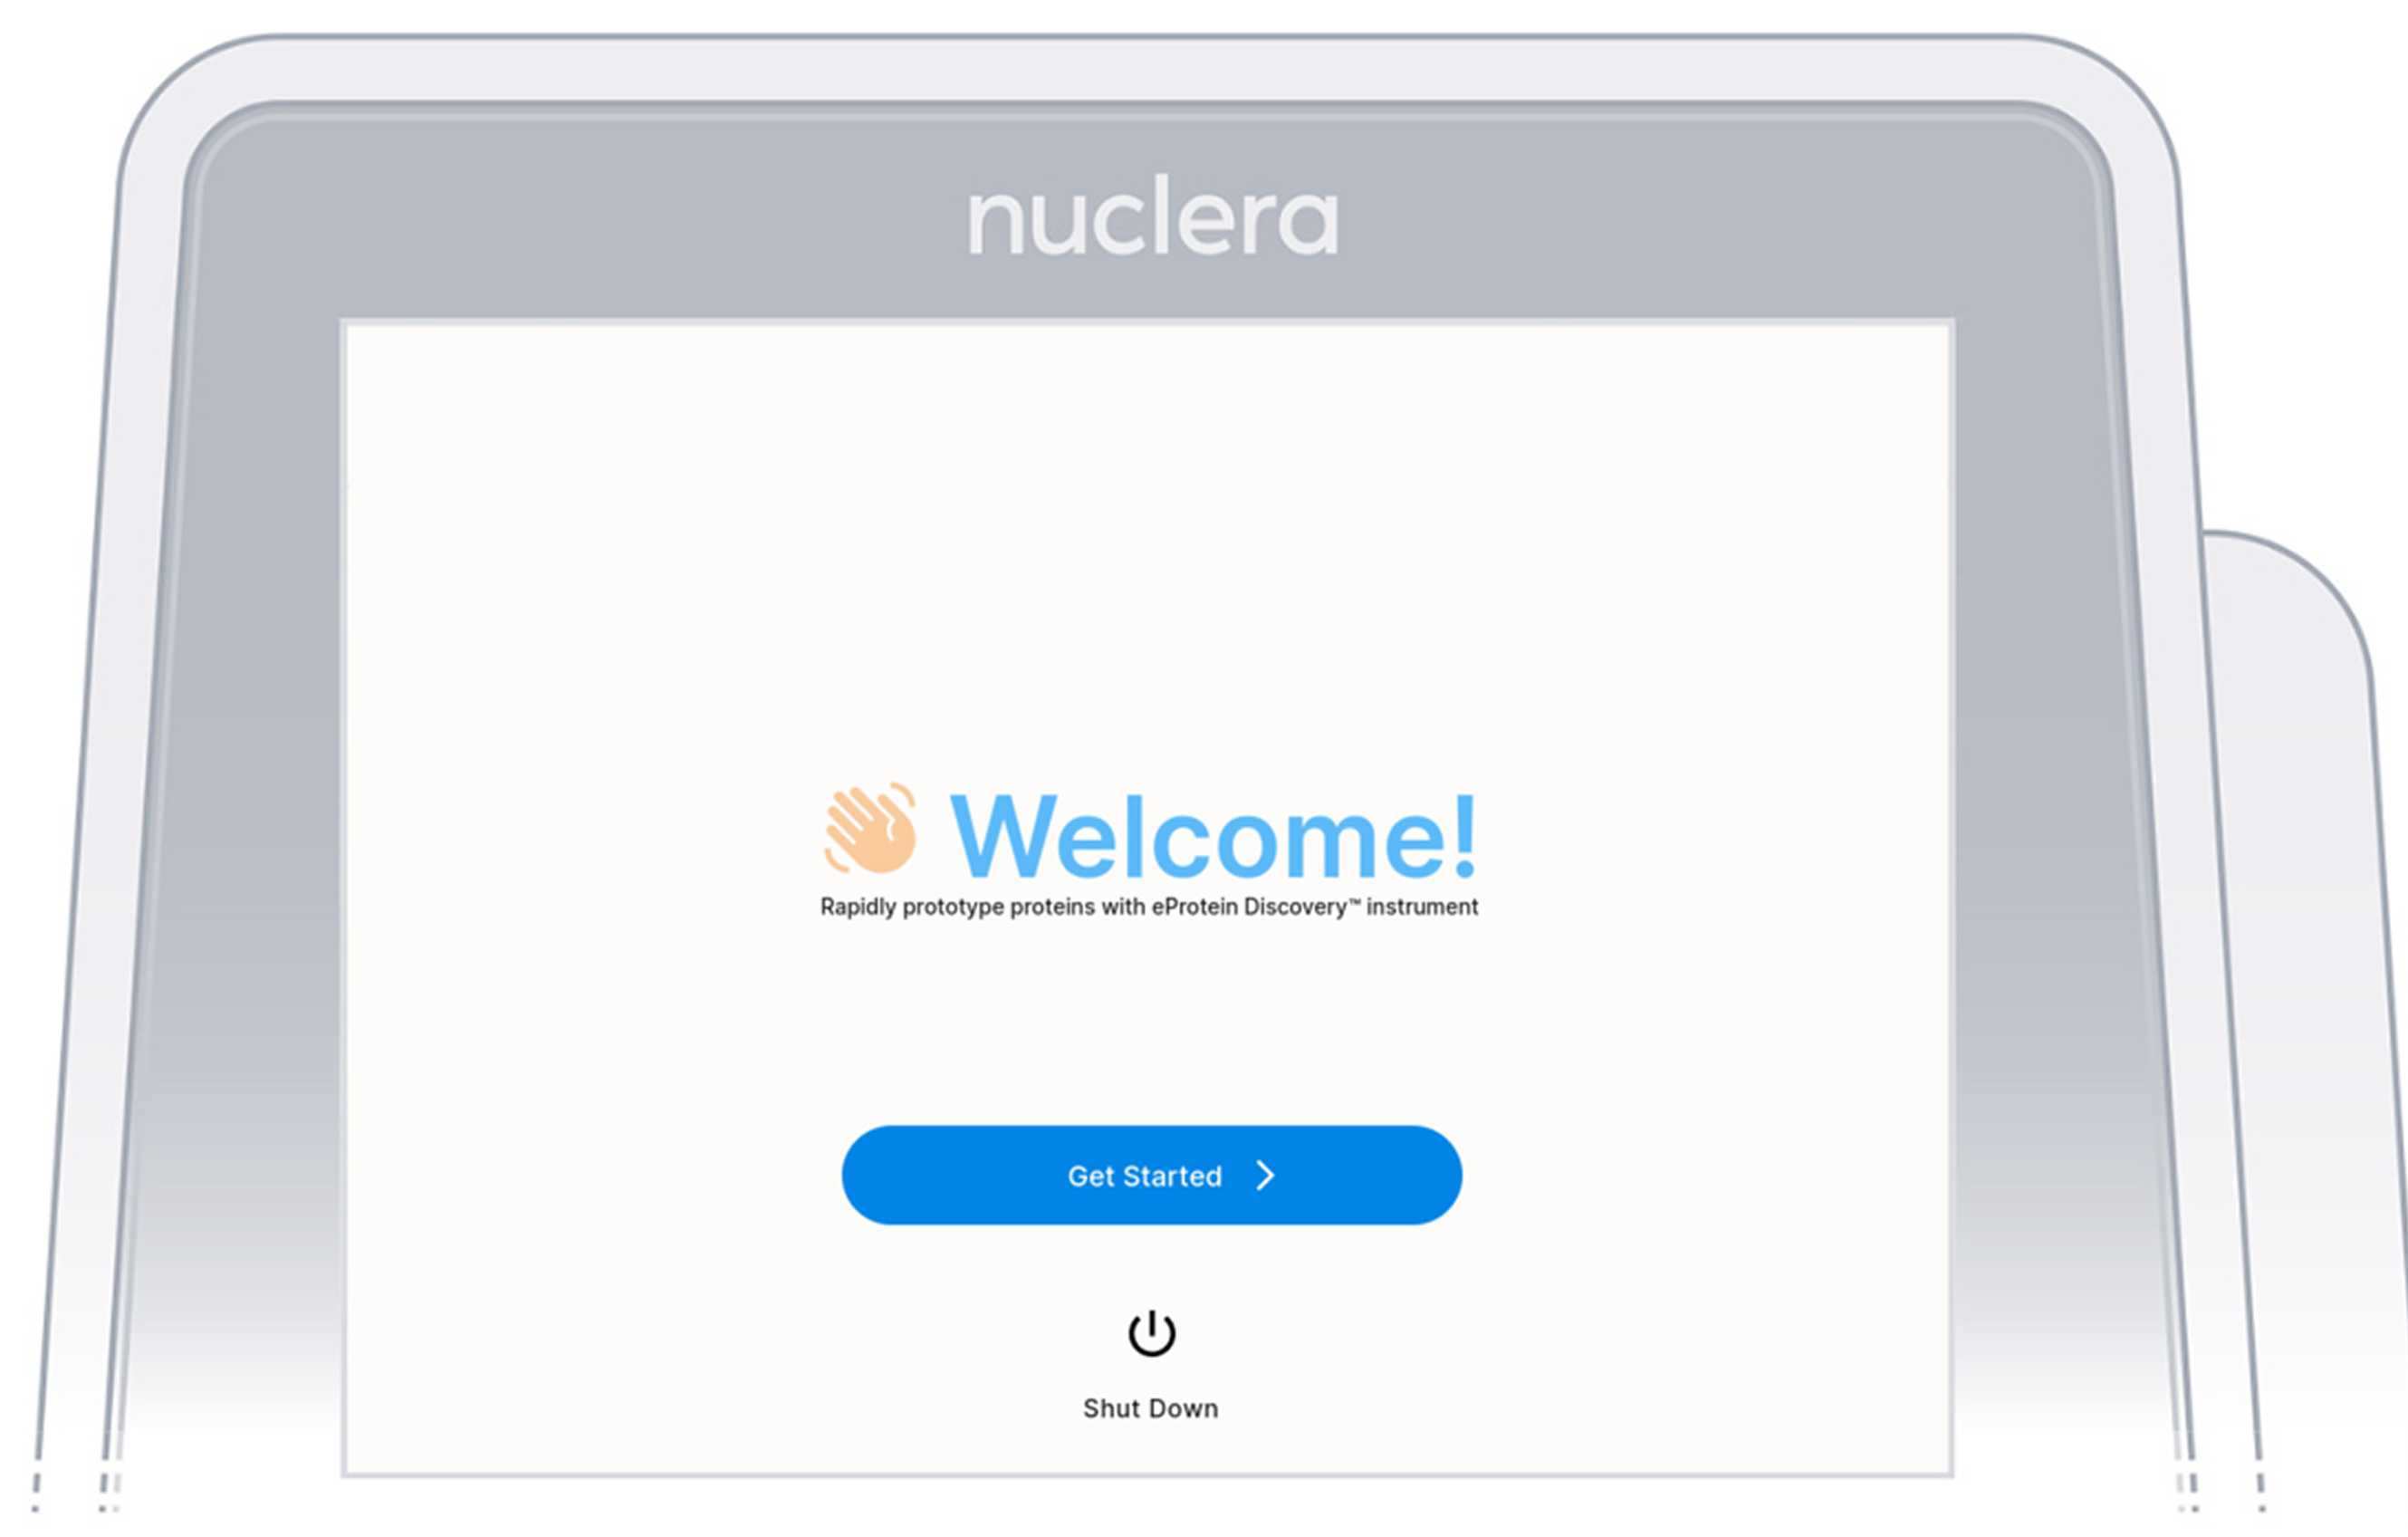
This will show a welcome screen. Press "get started".
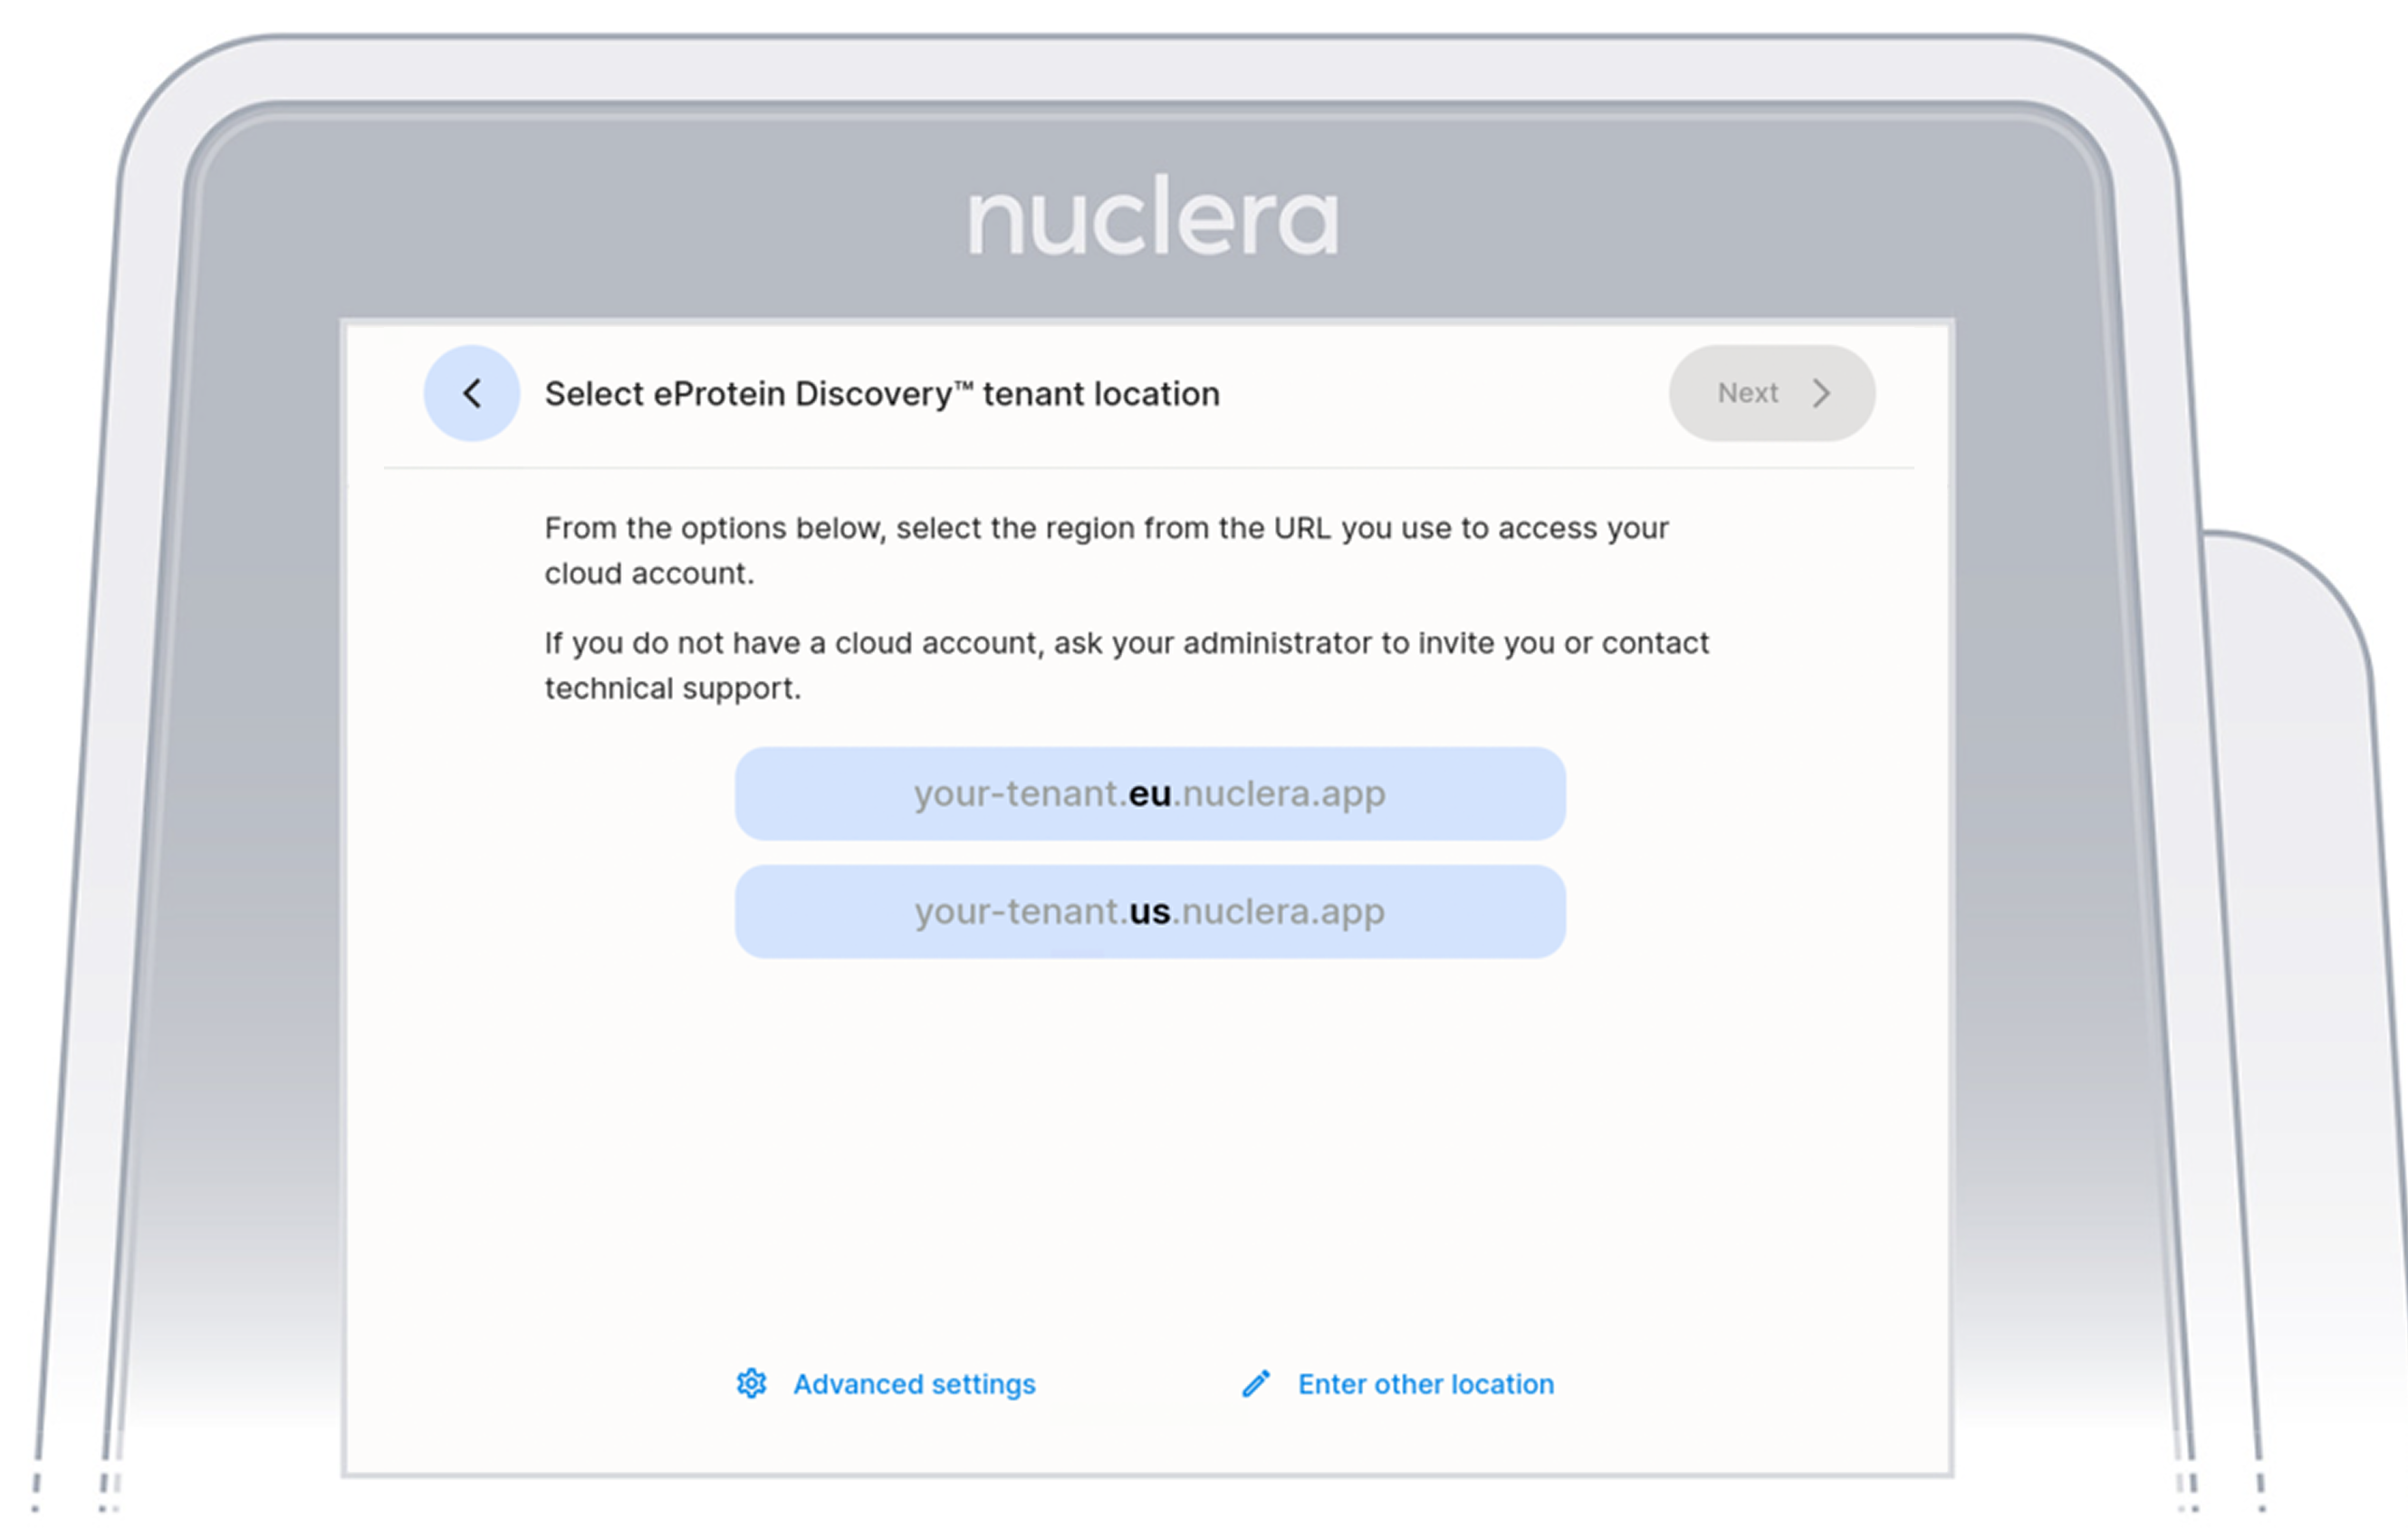
Set up the system location and tenant
The next screen allows the user to select the location for the instrument, which can either be US or EU.
- Select Location: Choose between US or EU. Select the region from the URL you use to access your cloud software account.
Enable Cloud Connected System
Connectivity checks
Once the tenant location is selected, the system undergoes connectivity checks. The eProtein Discovery tries to perform 3 checks:
- Network access
- eProtein Discovery Cloud
- Remote monitoring
Once all the checks are completed, the screen shows if the checks were successful or not.
The checks have a severity level (orange or red icon) and a status (Pass or Fail). If the check shows a warning, it is possible to click on the icon to get an error description. Until the error is resolved the Next button is greyed out.

It is possible to repeat the checks by clicking the Retry button on the top right hand side corner.
If you cannot resolve these connection issues, please contact Nuclera Technical Support at techsupport@nuclera.com.
If all the checks are successful and do not show any issues, the user will see 3 green checks.

Register the System
Once all the connectivity checks have been successfully completed, your eProtein Discovery instrument is ready to be registered to a specific tenant on the Cloud Software, using the registration code displayed on the instrument's screen. Note down the registration code provided and enter it on the Cloud Software from your computer within 24 hours of receiving this code.
Leave the instrument on until registration on the Cloud Software has been completed.
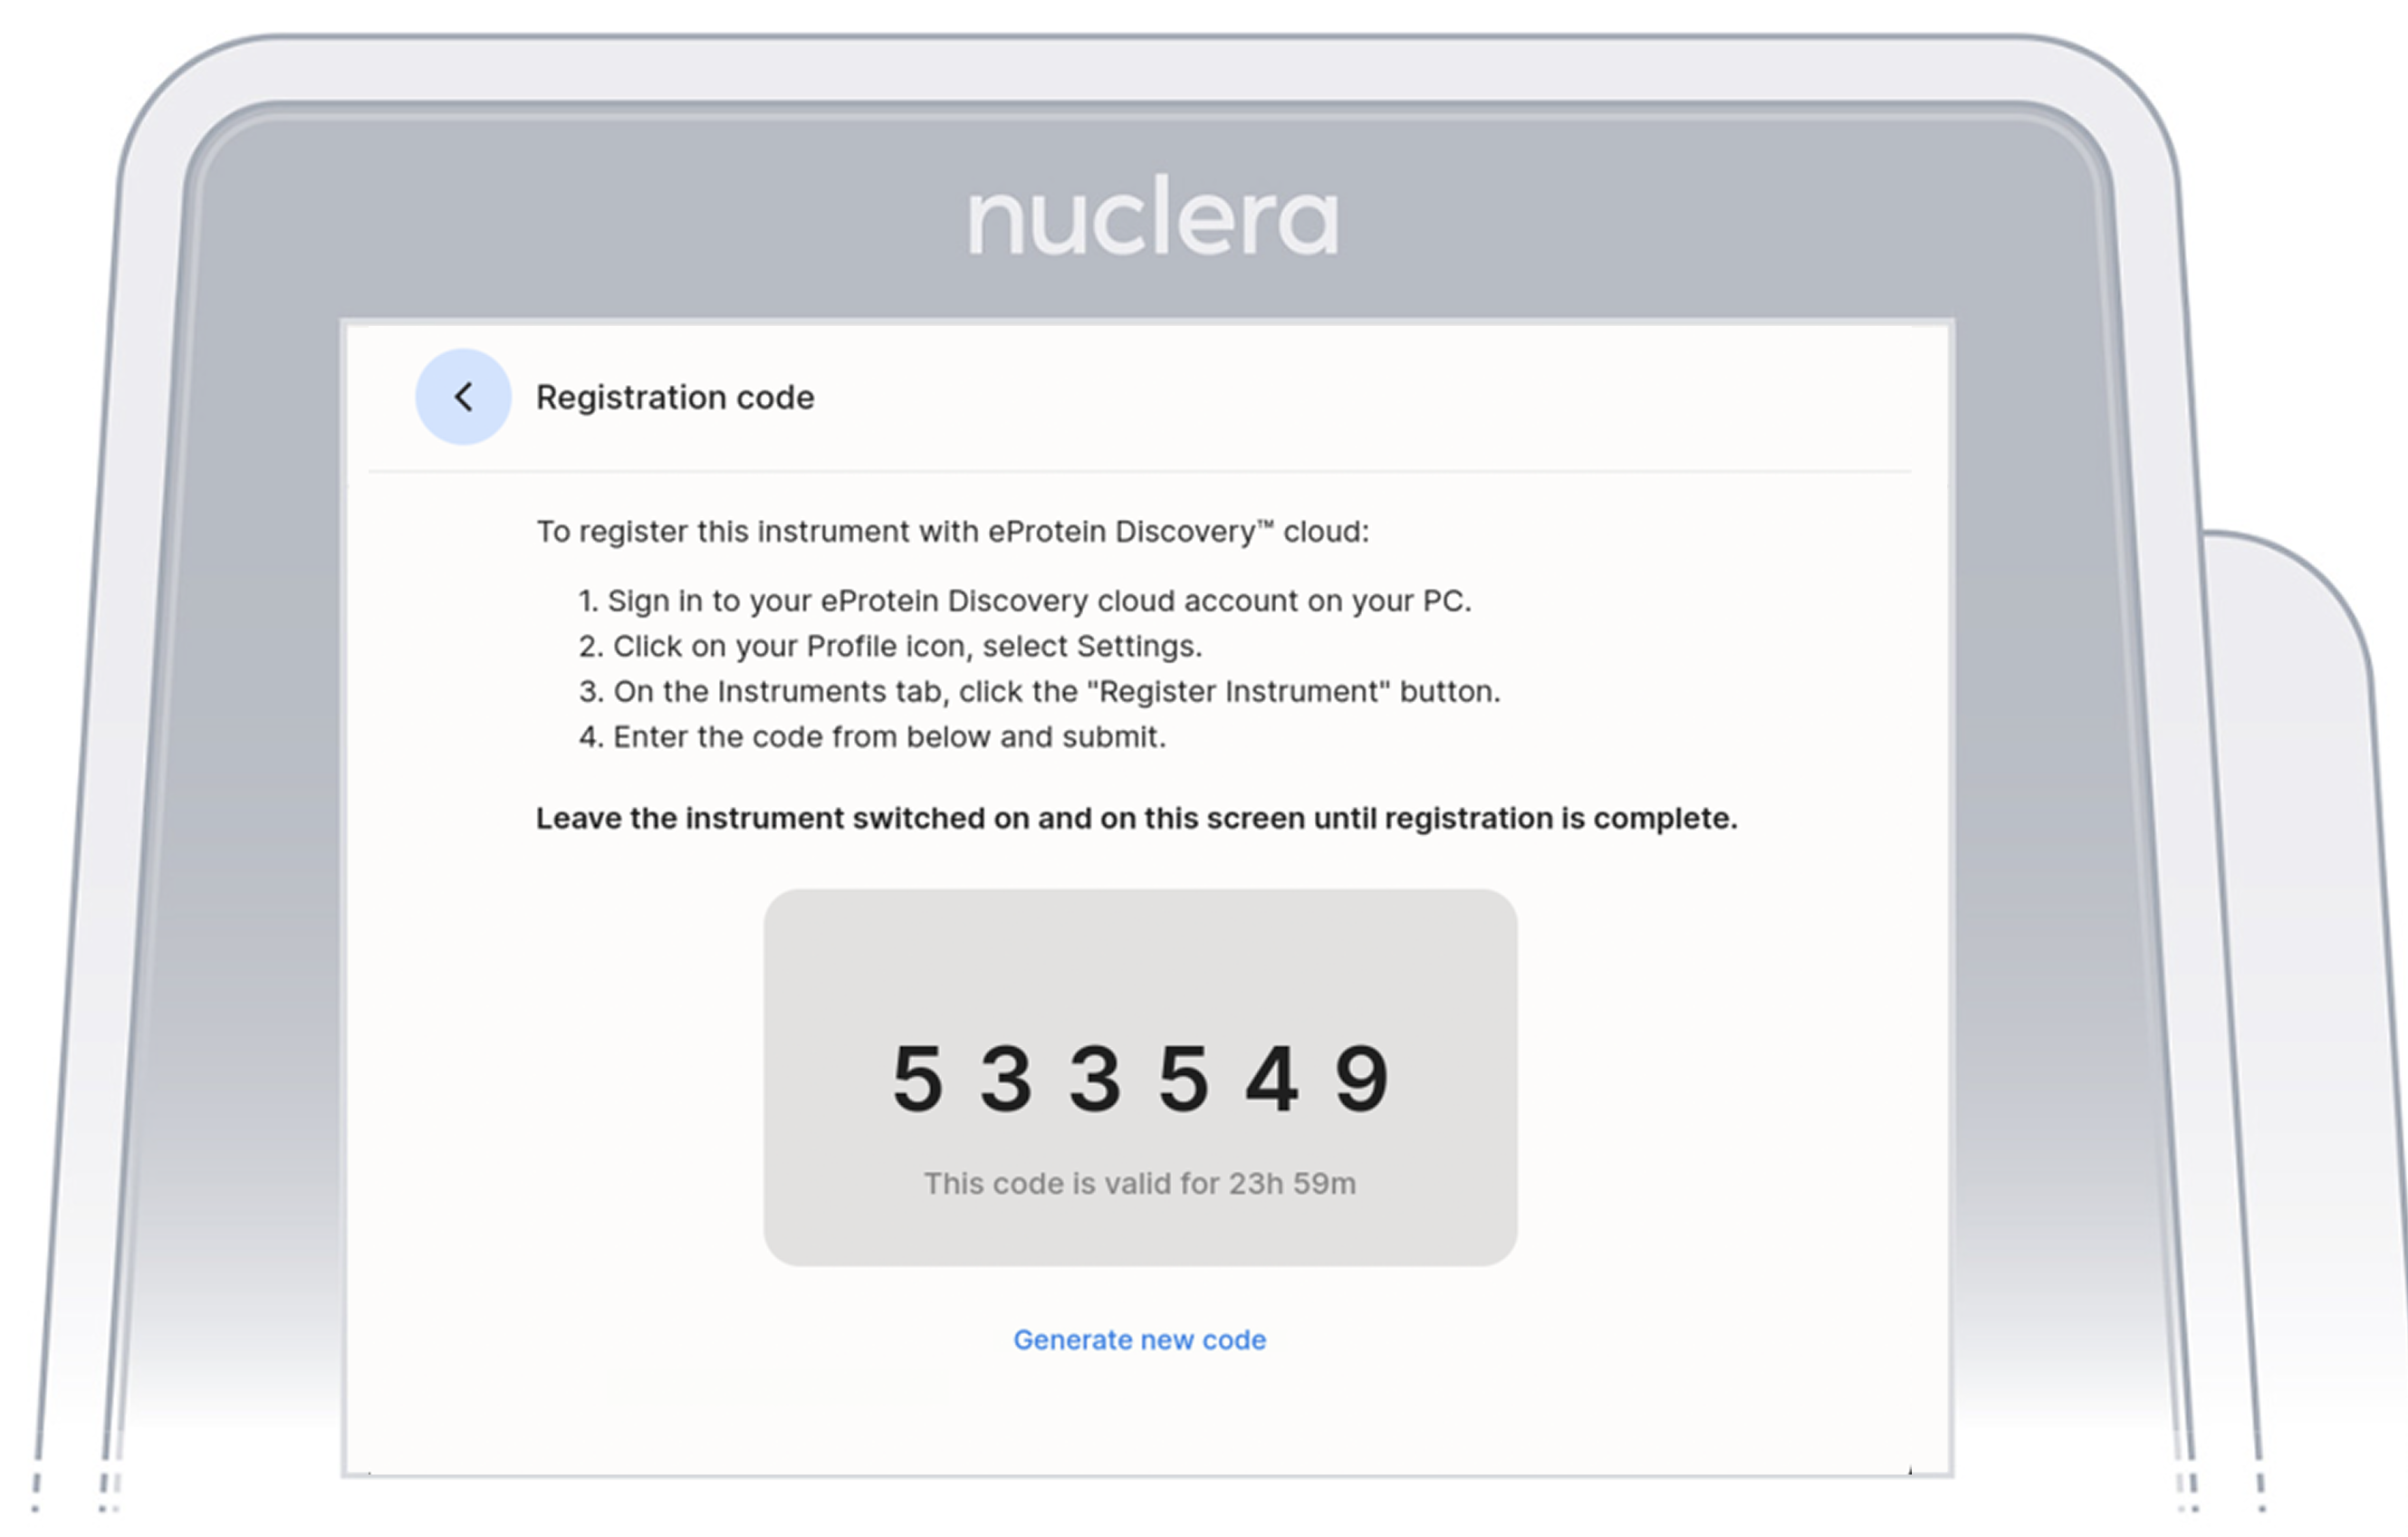
The instruction on the screen will guide the user on how to navigate into the Cloud Software to use the registration code.
The registration code has an expiration date of 24 hours. Once it has expired, to generate a new code, tap on Generate new code.
Add a new instrument on the Cloud Software
After completing the welcome flow it is necessary to complete the registration of the instrument on the Nuclera Cloud Software using a separate internet connected device.
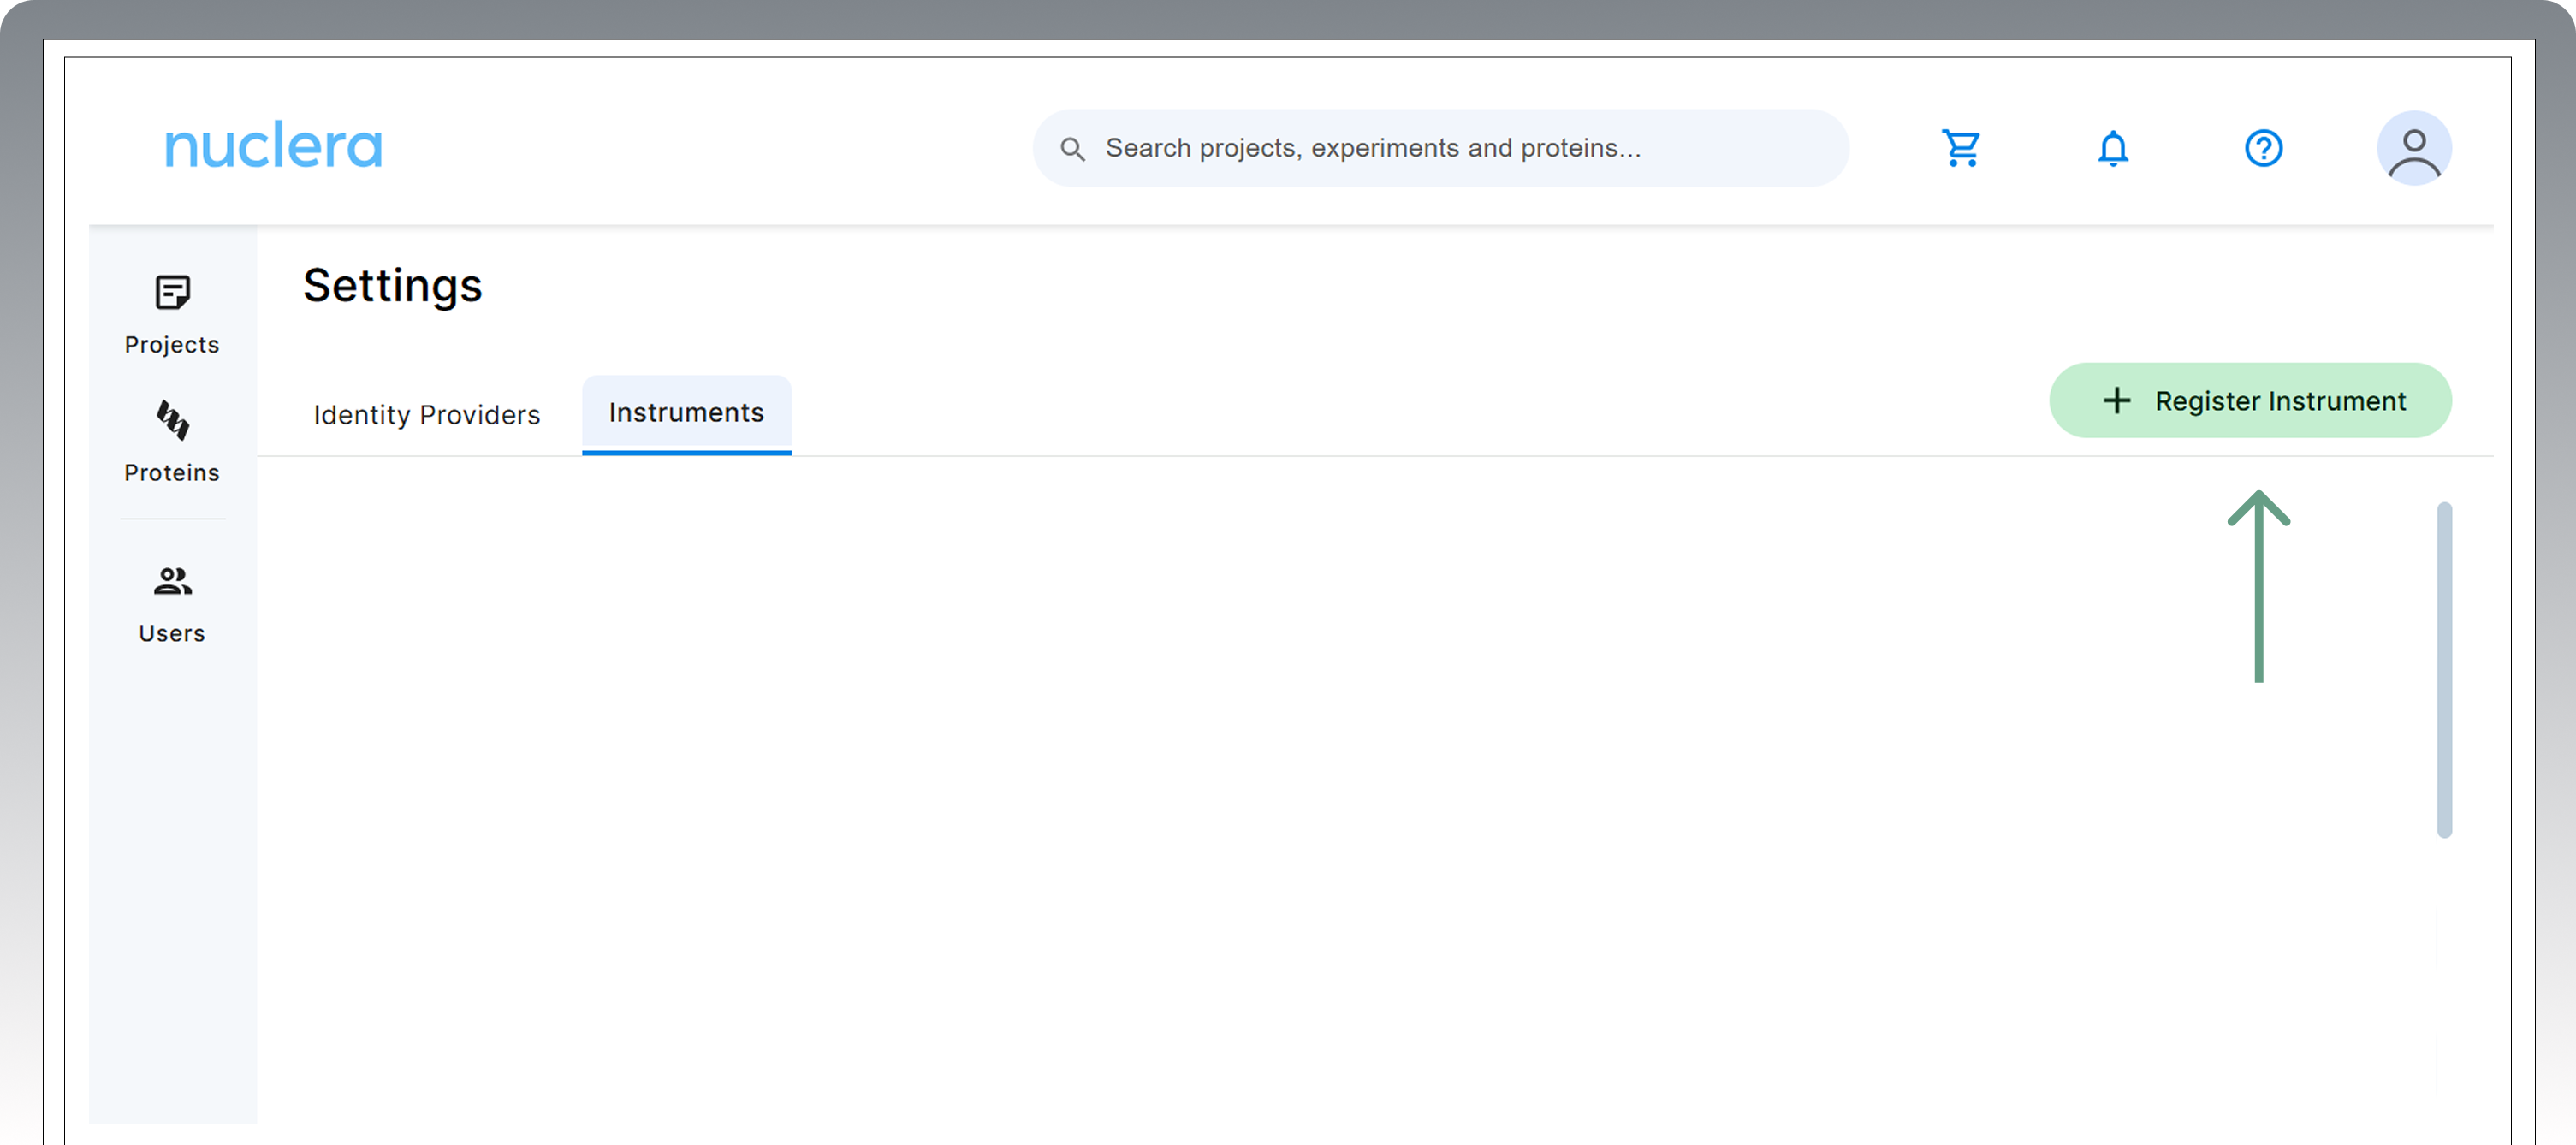
Access your Cloud Software account, click the profile icon on the top right-hand side, and select “Settings".
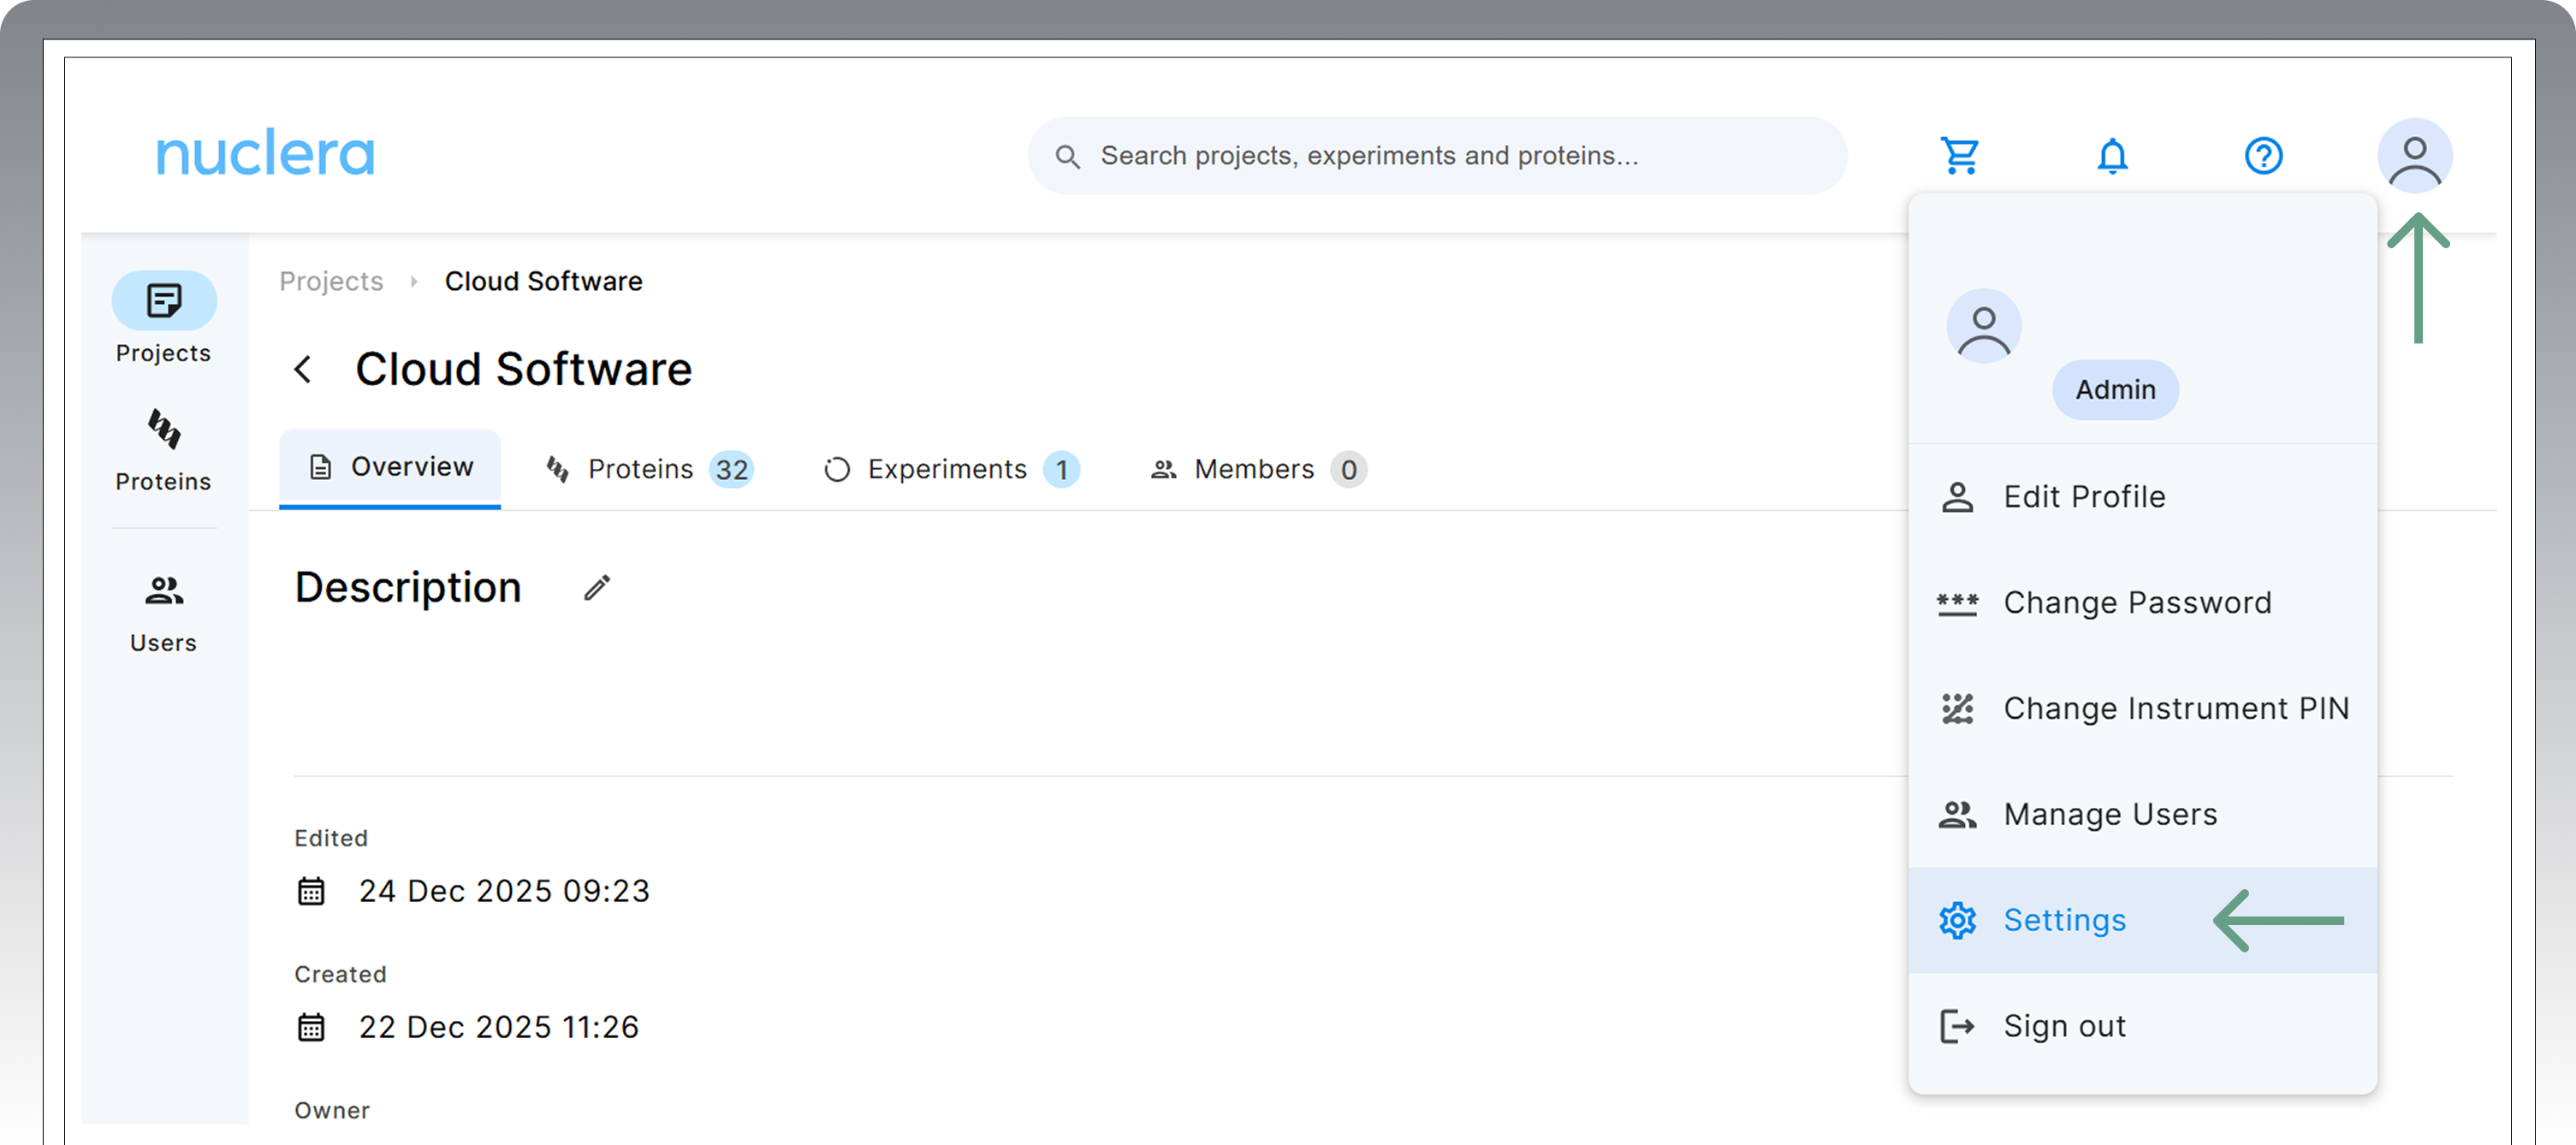
In the Settings window, navigate to the Instruments tab and click “Register Instrument”. This can be done by any user regardless of having admin access.
This will prompt the user to add the registration code displayed on the instrument at the end of the welcome flow.
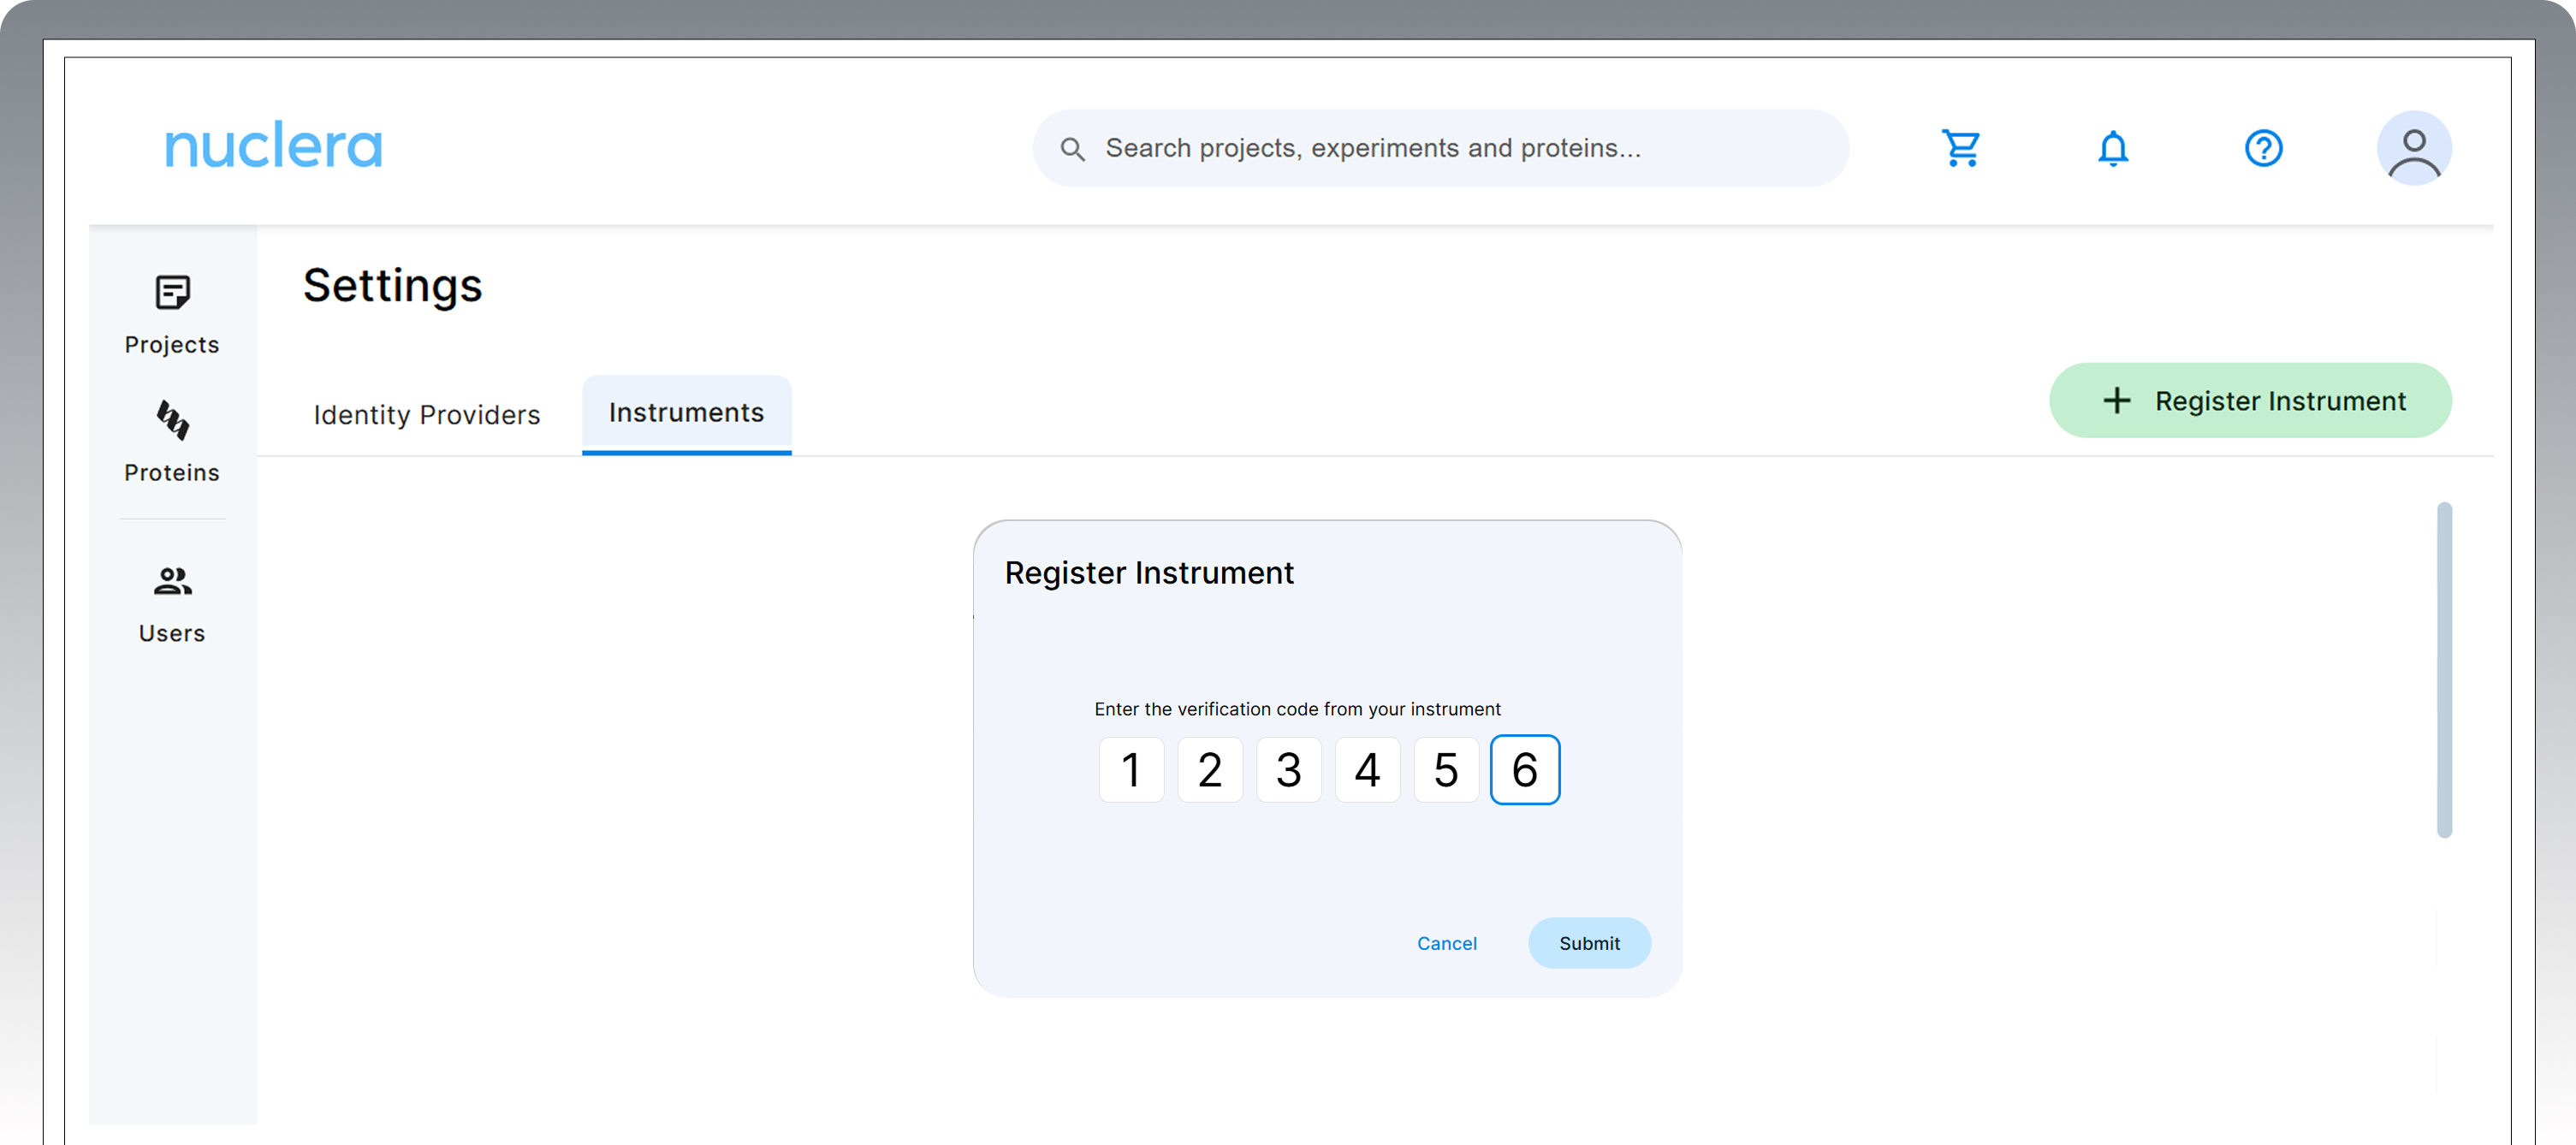
After the code has been prompted, click on “Submit”.
If the registration is successful, the instrument will be shown in the list of instruments.
It is not possible to unregister an instrument unless the instrument goes through a factory reset.
Enable Standalone Mode
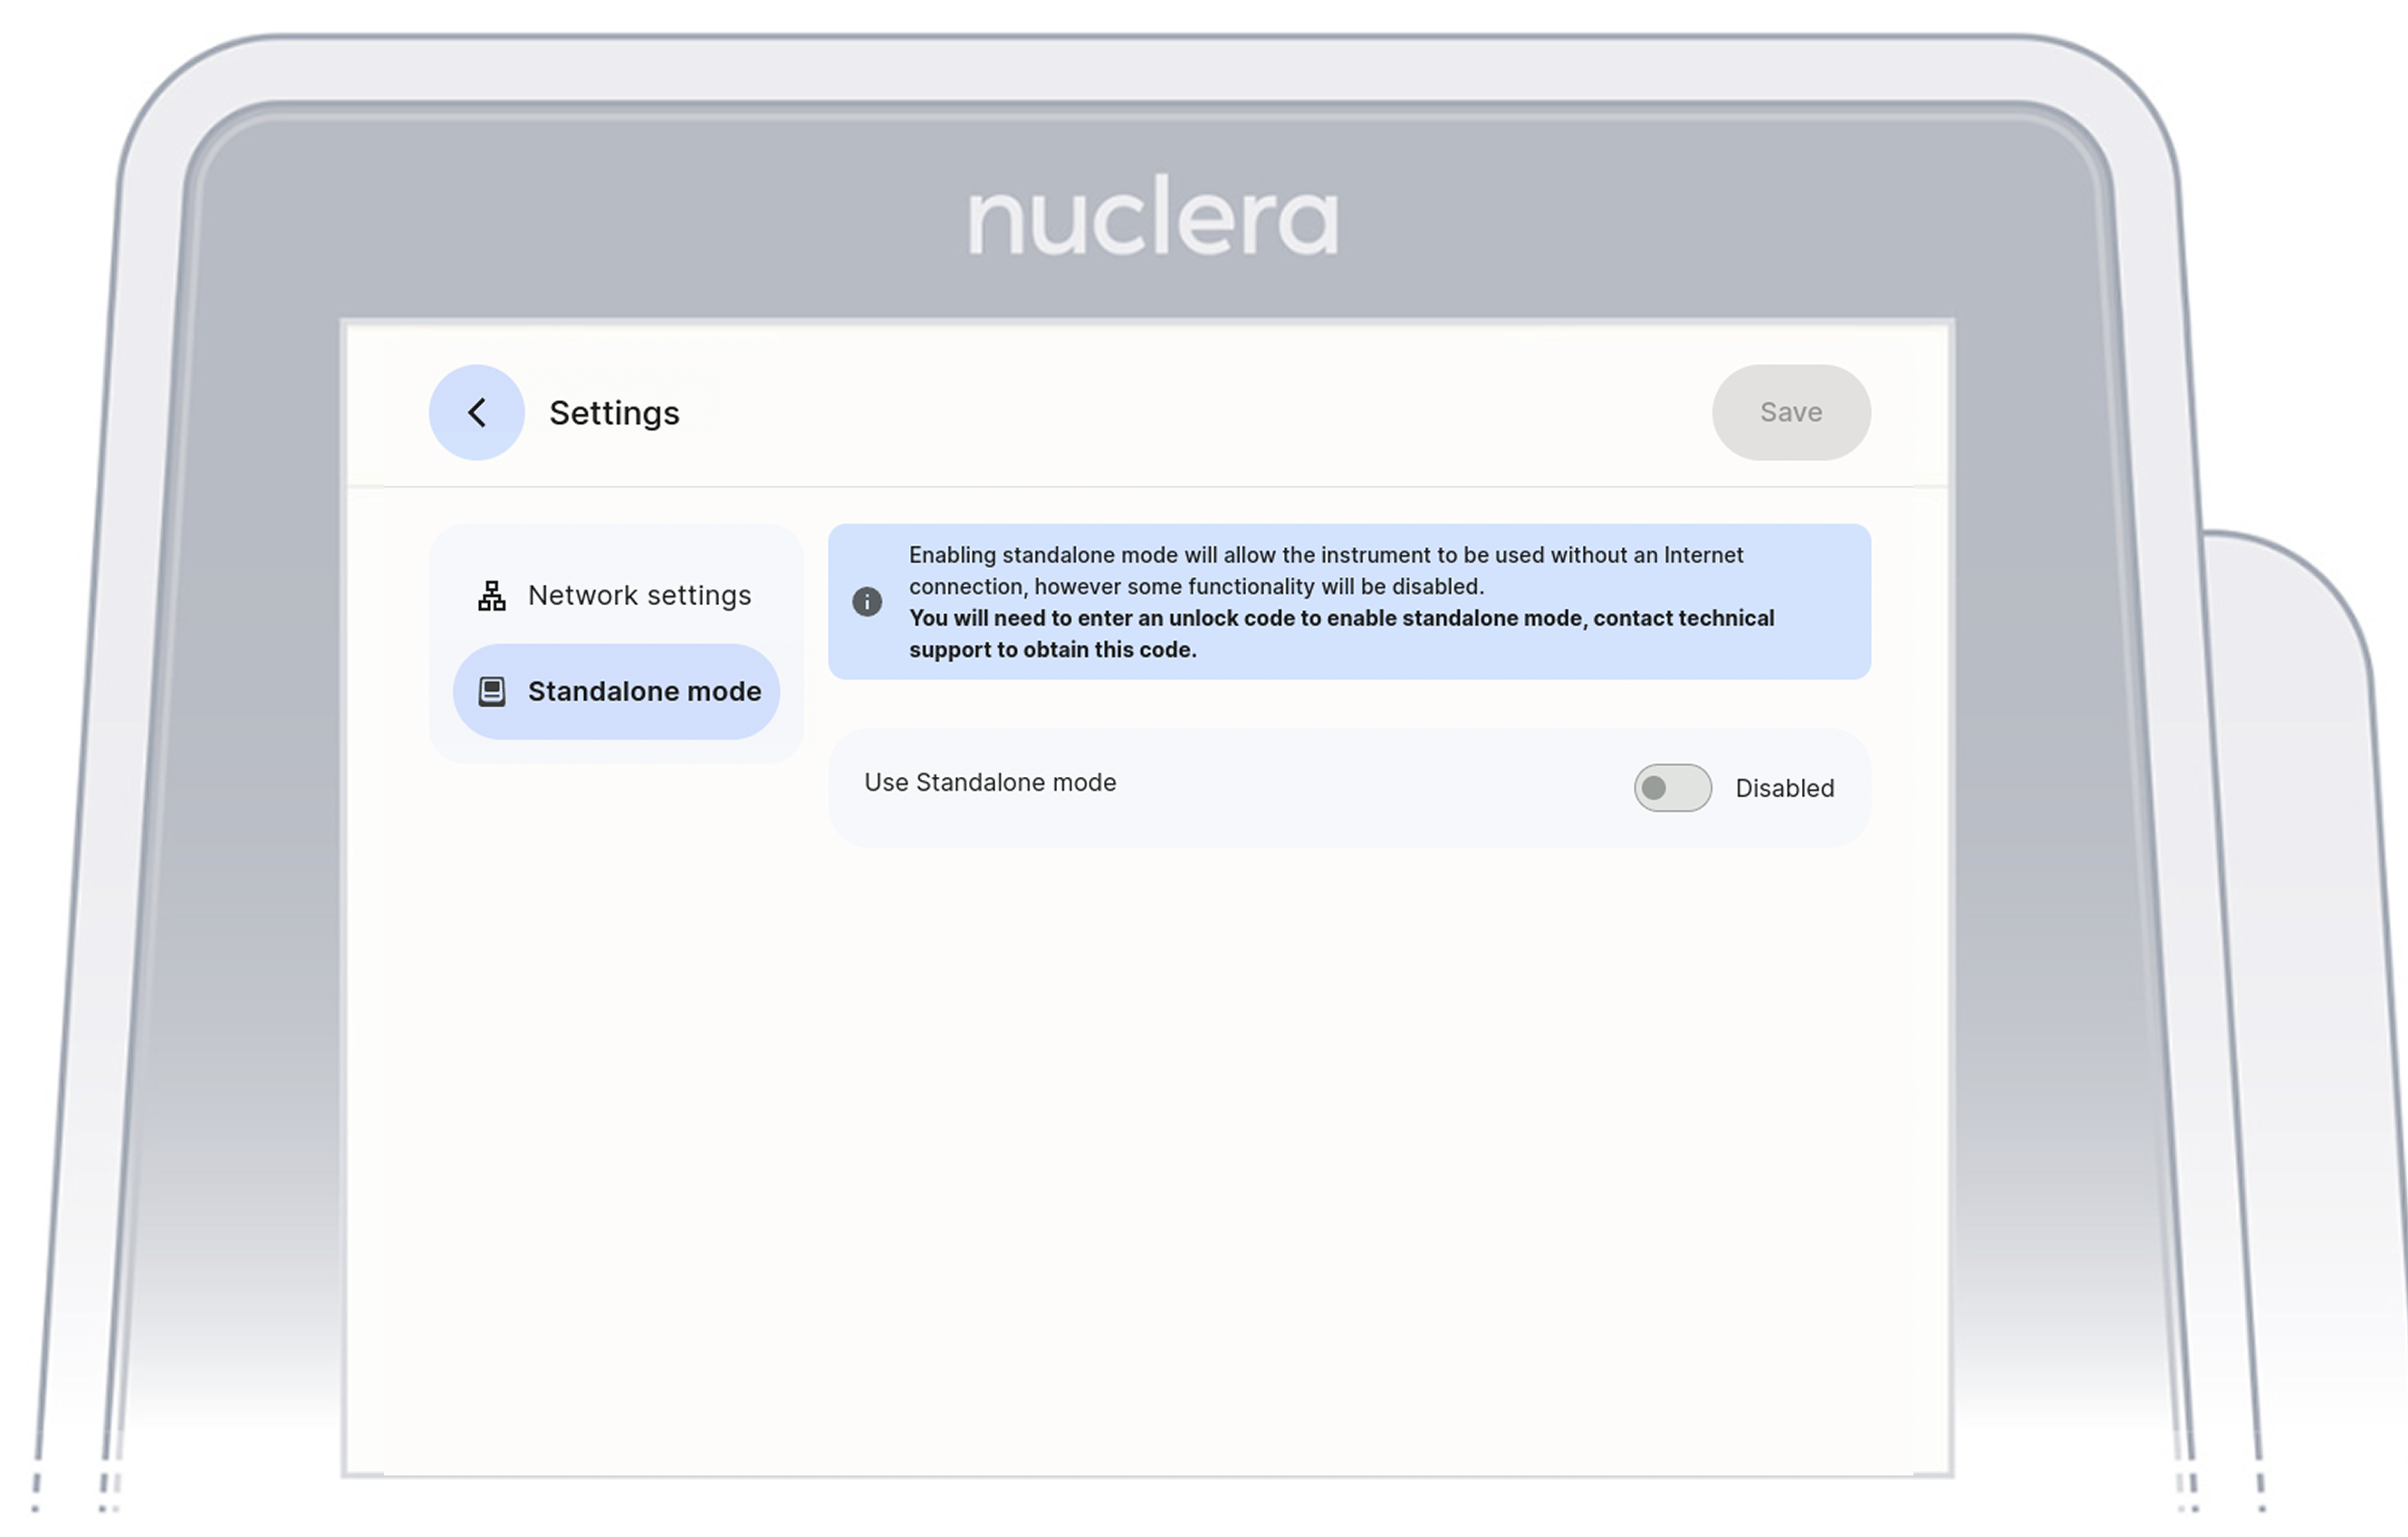
After the “Set up the system location” step, tap on the “Advanced Settings” button. When tapping this button, the screen will show a window with two sidebar items:
“Network Settings” and “Standalone Mode”. Tap on “Standalone Mode”
 .
.
Tap the bar on the right hand side of "Use Standalone Mode" to "Enable" the standalone mode.
A pop up window will appear asking the user to enter an unlock code. To obtain the code the user must contact the Nuclera Technical Support team via email at techsupport@nuclera.com.
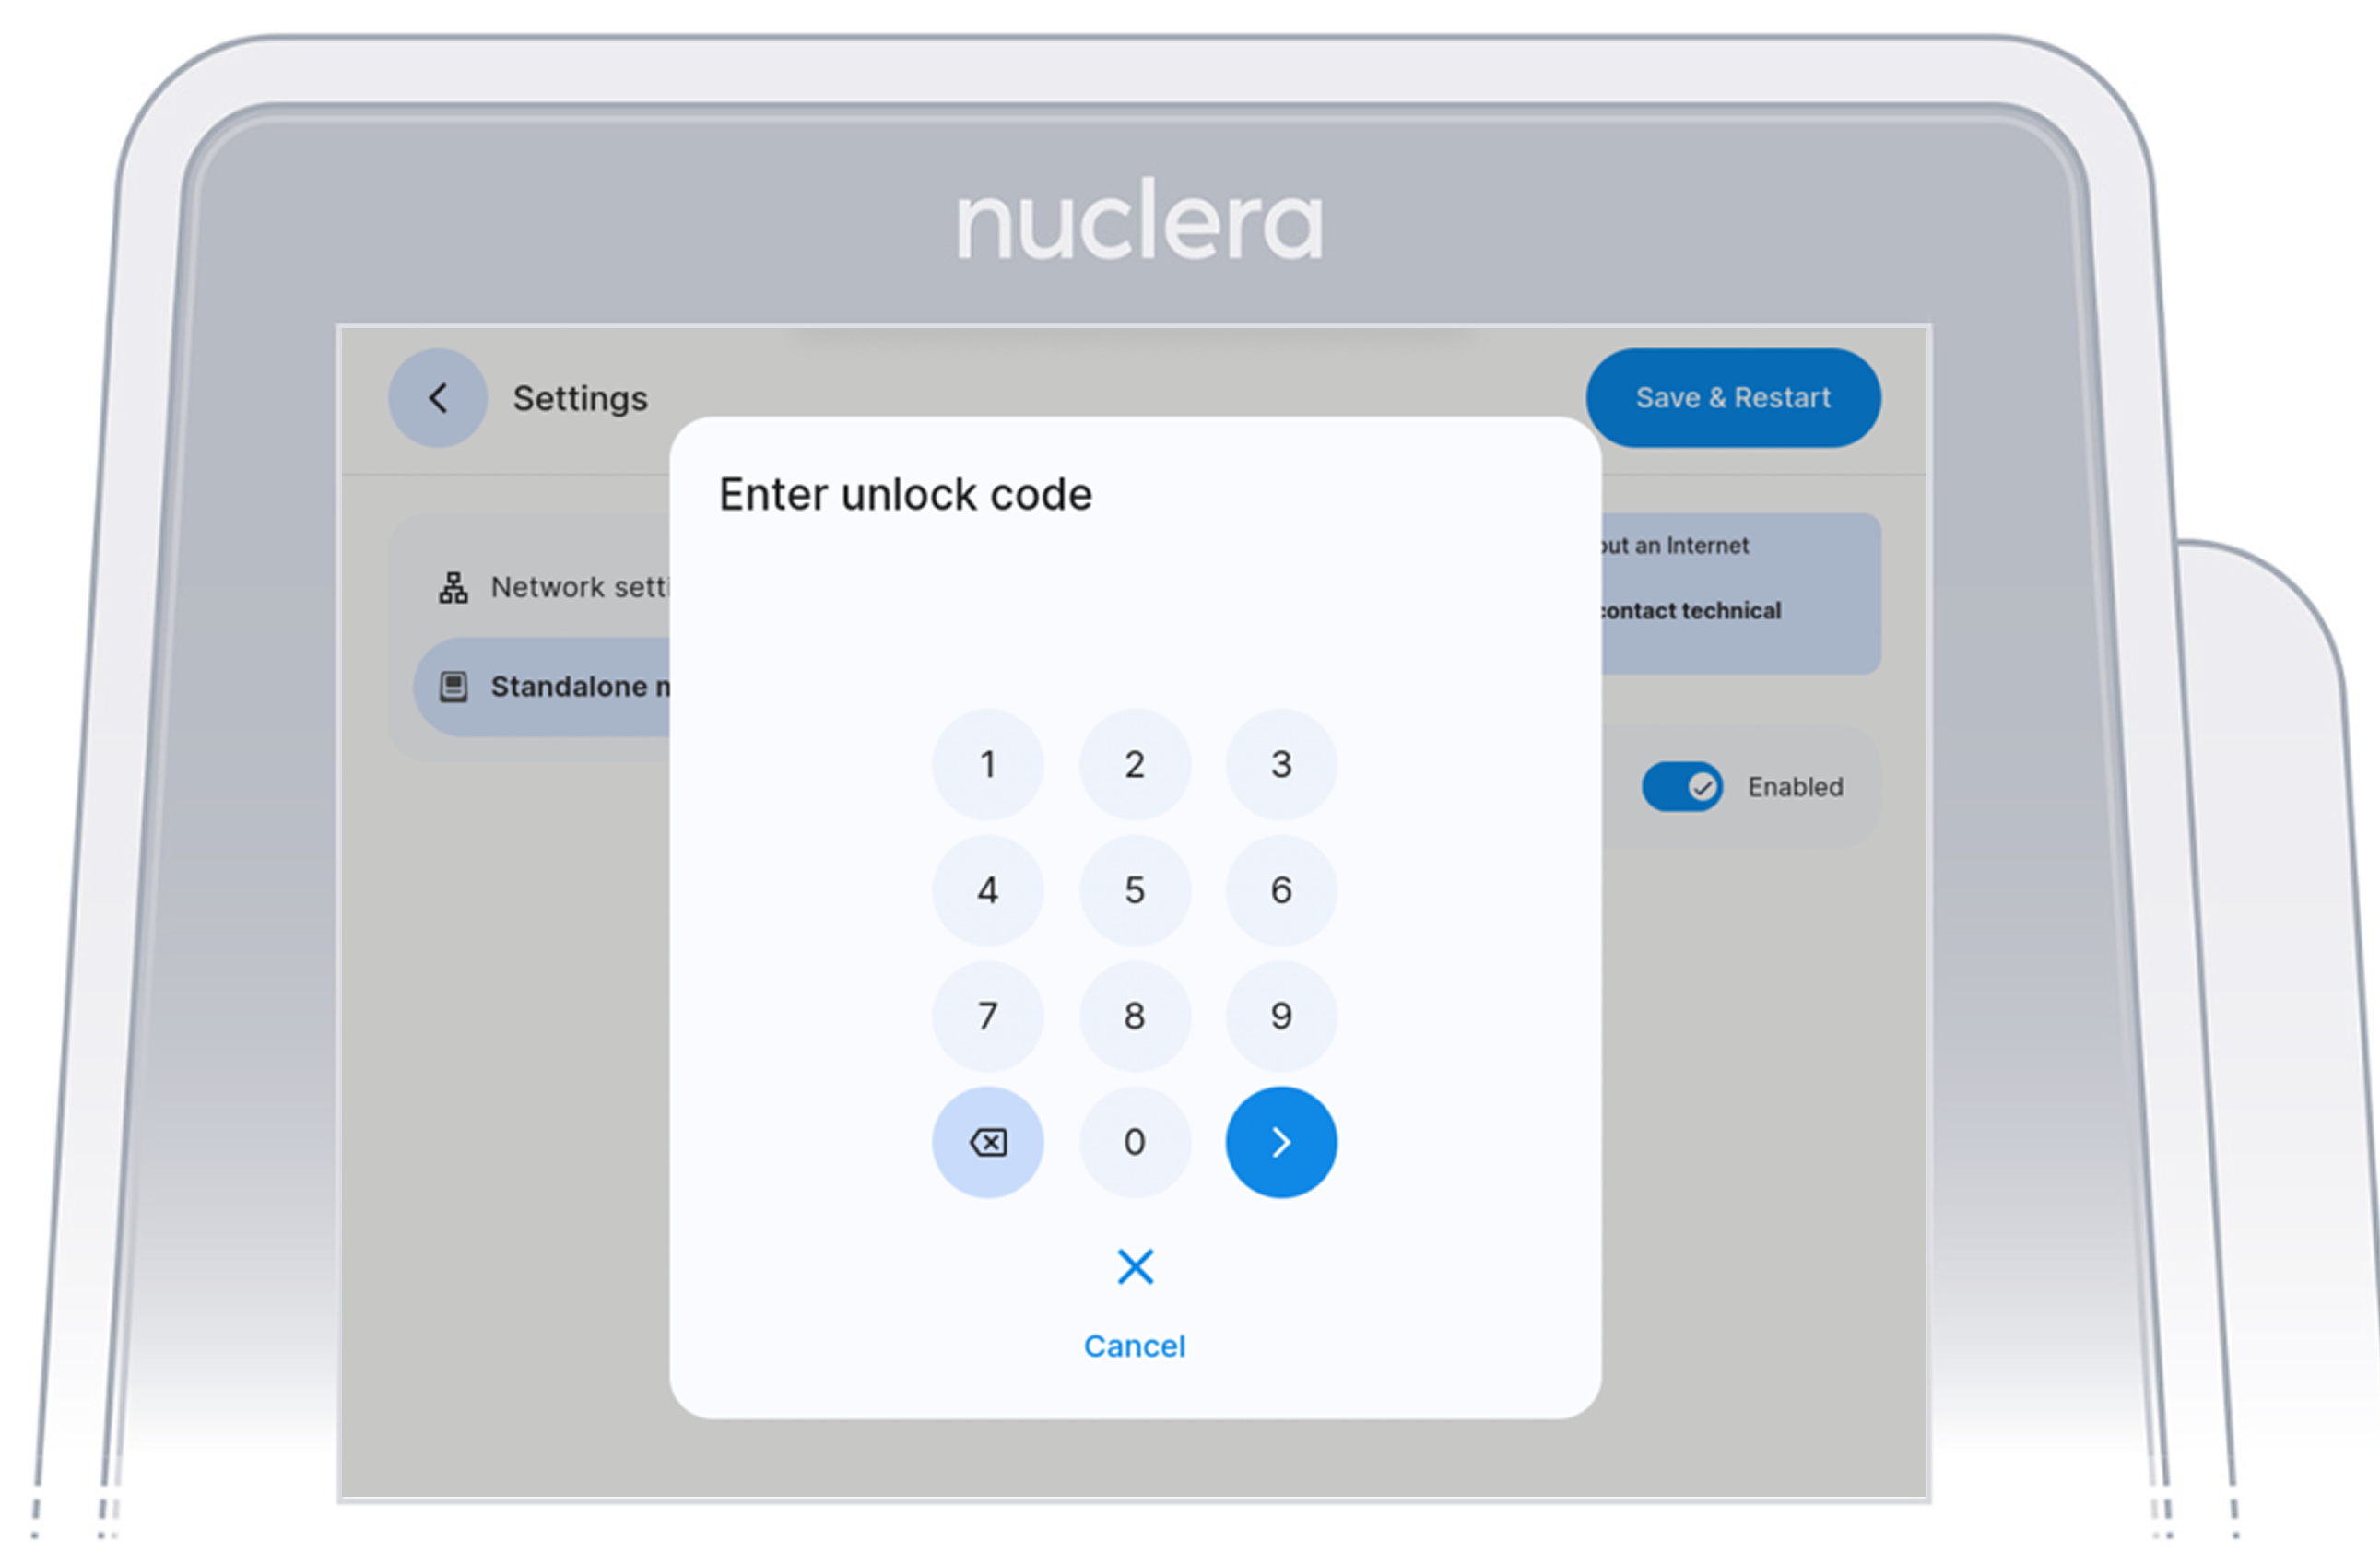
Once the correct unlock code is entered, the instrument will reboot itself and will show the “Experiment” screen.
Factory Reset
A factory reset will allow the user to wipe off all the data from the instrument and return it to its original factory state.
To do this, log in the system and tap on the main menu button on the top left hand side of the screen.
Under this, tap on the “Settings” option.

After tapping on "Settings", a menu with following option will appear:
- Region
- Software Update
- Network Settings
- Factory reset
Select Factory Reset and tap on Reset Instrument A pop up window will prompt the user to add an Reset code and a pop up message will be displayed to remind the user that any data saved on the instrument will be lost after the factory reset.
Nuclera Technical Support:
UK Phone +44 1223 942 761
US Phone: +1 508-306-1297
Email: techsupport@nuclera.com
Offices:
Nuclera UK (HQ):
One Vision Park, Station Road, Cambridge, CB24 9NP, UK
Nuclera USA: 1000 Technology Park Drive, Suite B, Billerica MA 01821, USA www.nuclera.com
Copyright © 2025 Nuclera Ltd. All trademarks are the property of Nuclera, Ltd. Visit nuclera.com/legal for more info.